Steph W. from SEOPressor


...help you check your website and tell you exactly how to rank higher?

92
score %
SEO Score

Found us from search engine?
We rank high, you can too.
SEOPressor helps you to optimize your on-page SEO for higher & improved search ranking.
By vivian on June 20, 2016
Previously I have written about LSI keyword and how it’s helping to create the Semantic Web, a vision Tim Berners-Lee had 10 years ago.
Some of you might be wondering. What is Semantic Web exactly? Well in short, you can think of it as a smart internet that’s intelligent enough to understand web contents as the objects or entities they represent instead of strings of HTML codes they are made out of.
Search engines back when Tim first coined the term “Semantic Web” is good at indexing web contents but not really sophisticated as they merely match keywords from queries to those in web contents. This leads to poor search result not very useful to the user.
Tim envision ways to make web contents understandable to machines (search engines, web browsers etc) just as it would to a human.
One way to achieve this is by using markups to describe contents in a way that is understandable to machine users across all platforms.
[bof_display_offer id=18960]
Markups are made out of metadata or in another word, data about data. Markups establishes the object they represent, their attributes and the way they relate to other objects.
Here’s an example of a markup in action:
<div vocab="http://schema.org/" typeof="Person">
  <span property="name">Paul Schuster</span> was born in
<span property="birthPlace" typeof="Place" href="http://www.wikidata.org/entity/Q1731">
<span property="name">Dresden</span>.
</span></div>
In plain text, human users will read the word “Paul Schuster was born in Dresden”.
Markups are usually hidden from direct human view but will be read by machines such as search engine crawlers and other parsers.
Behind the curtains, the markups tell machine readers a few things:
One takeaway we can summarize from this information is that an object or entity in Semantic Web will usually have these 3 attributes:
Implementing markups to make your contents understandable to machine readers will grant significant benefits. Few examples:
There are quite a lot or different markups, each with different properties and purposes. For us internet marketers, there are 4 markups that will benefit us the most:
So I’ll go through the basics on how to implement each of these widely used markup.

Schema Markup can be added directly to the HTML of each individual web page. There are three formats mainly used to implement Schema – Microdata, RDFa and JSON-LD.
But for now I’ll just show the basics to implementing Schema using Microdata.
The following is a basic example of how you would markup a blog post on, let’s say, Finding Dory (The new Pixar movie directed by Andrew Stanton, for those who aren’t in the know):
<div itemscope="">
<h1>Finding Dory</h1>
<span>Director: Andrew Stanton (born December 3, 1965) </span>
<span>Animation</span>
<a href="../movies/findingdory-theatrical-trailer.html">Trailer</a>

</div>
You’ll want to add an itemtype to the itemscope in order to specify that the HTML that is contained in the
<div itemscope="" itemtype="http://schema.org/Movie">
<h1>Finding Dory</h1>
<span>Director: Andrew Stanton (born December 3, 1965) </span>
<span>Animation</span>
<a href="../movies/findingdory-theatrical-trailer.html">Trailer</a>

</div>
Basically, you just add item type attributes to the relevant
The item type attributes are defined by the schema.org data type hierarchy. You’ll want to use their full hierarchy to learn what data types to use. The following are the main data types, all of which have numerous sub-types.
So you’ll just need to know what kind of content you are tagging and use the appropriate data type.
With access to their full hierarchy, performing schema markup isn’t that difficult, but as you can imagine, doing this for hundreds of webpages is going to take an immense amount of effort – and time.

Dublin core schema consists of a set of terms used to describe various online resources; for example, images, web pages, video and more. It also describes physical resources that include books or CDs, and even objects, like artwork.
Here’s a simple example on using Dublin Core to tag an article:
<meta name="DC.Type" content="Article">
<meta name="DC.Title" content="How To Use Markup To Improve SEO">
<meta name="DC.Description" content="Article on how to use markups in your website to improve SEO">
<meta name="DC.Creator" content="Azfar Hisham">
<meta name="DC.Date" content="2016-06-16T11:18:08+0800">
Then there’s the Resource Types, which are used to categorize the nature or genre of the resource’s content. The following is the default list of Dublin Core’s resource types:
You just need to refer to the right resource types to represent your contents and you’re good to go.

At this stage in the game, every business should have a Facebook page. However, you should also being using Facebook’s Open Graph feature.
By marking up content on your site using Open Graph tags, you’ll optimize that content for sharing on Facebook.
This will help reduce sharing issues – for example, when you post a link to Facebook to a blog post and it displays the wrong corresponding image.
Obviously, this can have a negative impact on your click-through rates, and as a result, your conversions.
There are five ways to mark up content using Open Graph. These include the title, URL, description, image and type.
1. Title
The Open Graph Title is pretty simple, it’s just the title of your content and does basically the same thing as a meta title tag. It looks like this:
<meta property="og:title" content="Title of your content">2. URL
This is the page you set for where your shares will go to and is important if you have more than one URL for the same content. It looks like this:
<meta property="og:url" content="the URL of your webpage">3. Description
The description is similar to a regular meta description tag and is meant mostly to give users a good idea of what your content is about. It looks like this:
<meta property="og:description" content="A description of your content.">4. Image
You don’t necessarily need to use the same image displayed on your Facebook link as the image used in your content. The original image may not help the content to stand out on Facebook, which is why you might choose something else. Of course, you’ll want to make sure your image is big enough (and not too big) to be displayed properly on Facebook. The markup should look like this:
<meta property="og:image" content="the URL for your image.jpeg">5. Type
Identifying the type of content your link provides is important. This is because if a user “likes” your link, then the type selected for your content determines where your content will appear in that user’s interest section of their profile. Here is what it should look like for a blog post you’ve shared:
<meta property="og:type" content="blog">There are a large number of types that you can use, including the following categories, which all contain sub-types as well:
Be sure to look at the full list of Open Graph types when marking up your content for Facebook.

Twitter Cards are basically Tweets in which you can add images, videos and more to help drive traffic to your site.
By marking up your webpages for Twitter Cards, users that Tweet links to your page will have a Twitter Card added to their Tweet that will be visible to their followers.
There are only four Twitter Card types:
1. Summary Card
The summary card is designed to provide users with an accurate description of the content you’re linking to. It should look like this:
<meta name="twitter:card" content="summary">
<meta name="twitter:site" content="@website">
<meta name="twitter:title" content="The title of your content">
<meta name="twitter:description" content="View the content on example website.">
<meta name="twitter:image" content="URL of picture.jpg">
2. Summary Card With Large Image
This Twitter Card is basically the same as a Summary Card except that it uses a larger image. It should look like this:
<meta name="twitter:card" content="summary_large_image">
<meta name="twitter:site" content="@website">
<meta name="twitter:creator" content="@name of creator here">
<meta name="twitter:title" content="The title of your content here">
<meta name="twitter:description" content="A description of your content here.">
<meta name="twitter:image" content="URL of your large image here.jpg">
3. App Card
An App Card is a bit different in that it drives the installation of mobile apps. App Cards can include the name, description and icon of the app as well as other information, such as price and rating. Here’s an example:
<meta name="twitter:card" content="app">
<meta name="twitter:site" content="@website">
<meta name="twitter:description" content="A description of your content here.">
<meta name="twitter:app:country" content="Country of the app">
<meta name="twitter:app:name:iphone" content="App name for iPhone">
<meta name="twitter:app:id:iphone" content="App id for iPhone">
<meta name="twitter:app:url:iphone" content="App URL for iPhone">
<meta name="twitter:app:name:ipad" content="App name for iPad">
<meta name="twitter:app:id:ipad" content="App id for iPad">
<meta name="twitter:app:url:ipad" content="App URL for iPad">
<meta name="twitter:app:name:googleplay" content="App name for Google Play">
<meta name="twitter:app:id:googleplay" content="App id for Google Play">
<meta name="twitter:app:url:googleplay" content="App URL for Google Play">
4. Player Card
Player Cards allow you to deliver rich media, such as video clips and audio streams, to users.
To use Player Cards, your content will have to be unzipped on your site so that it’s available on a path accessible to the public.
Once you’ve done this, you need to make sure that the “twitter: image,” “twitter: player,” and “twitter: player: stream” values are all directed to your server and your file locations.
As you can see, implementing markups are not impossible even if you have no technical skills.
Online resources are available online for free to be used as reference every time you need to mark your contents.
With that being said, referring to comprehensive resources and implementing markups can be quite a hassle.
Once or twice is still okay but when you’re tagging every page of your website, it does gets tedious.
Not to mention since we are dealing with codes, one tiny mistake, even a misplaced dot can wreck your website.
That’s why we incorporate an automatic markup builder in our latest plugin, SEOPressor Connect.
This feature actually started off initially as a way to help tag our own website. The first markup language we included in the builder was Dublin Core.
Later on we polished it and included it in the previous version of SEOPressor. As more markup languages becomes more prominent we decided to expand the Semantic Builder and in included it in our latest plugin.
So you’ve seen how you can manually implement markup languages in your website manually.
With SEOPressor Connect, you can practically forget them as the Semantic Builder will automatically create the markup for you.
You just need to select the right content type and put in the details using a GUI. I’ll show you how it’s done:
Schema.org
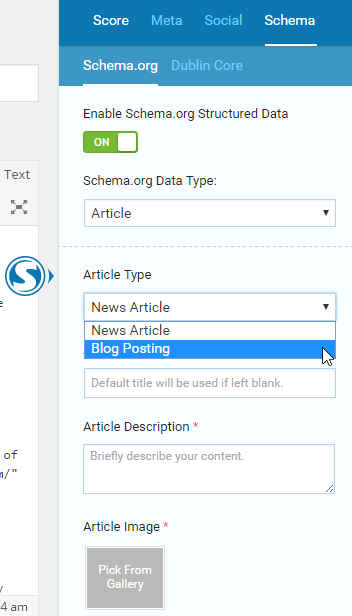
Step 1: Turn on the Schema.org Structured Data to enable search engines to understand your website and select the Type of your content.
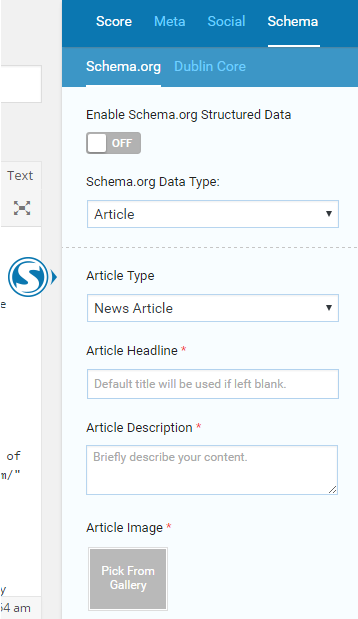
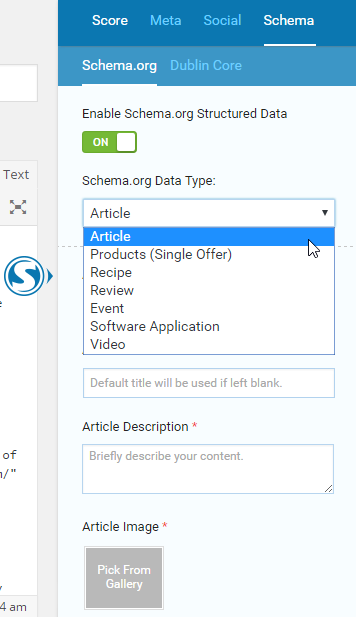
Step 2: Choose your Article Type.
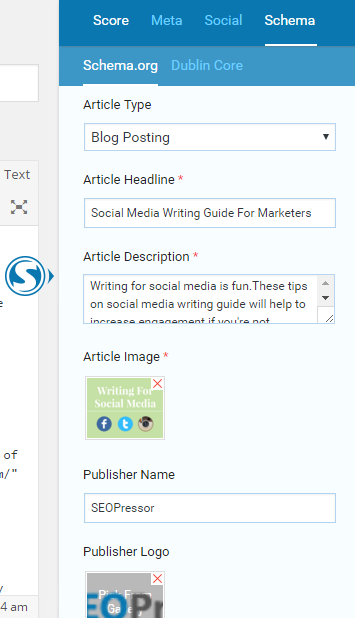
Step 3: Fill in your Article and Publisher details.
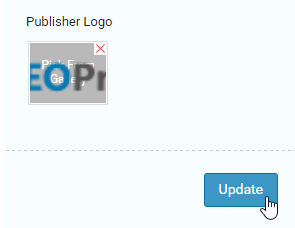
Step 4: Click ‘Update’ and you’re done!
Now let’s look at Dublin Core next.
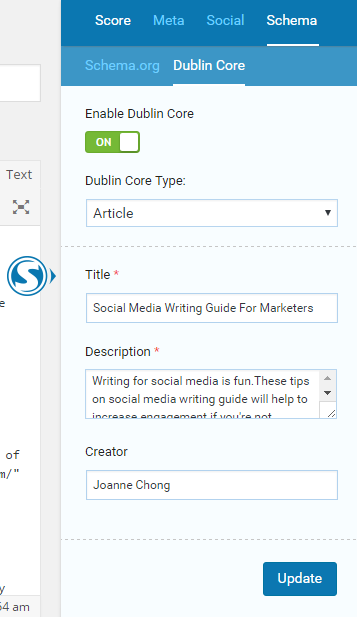
Dublin Core
Step 1: Select the Type of your content.
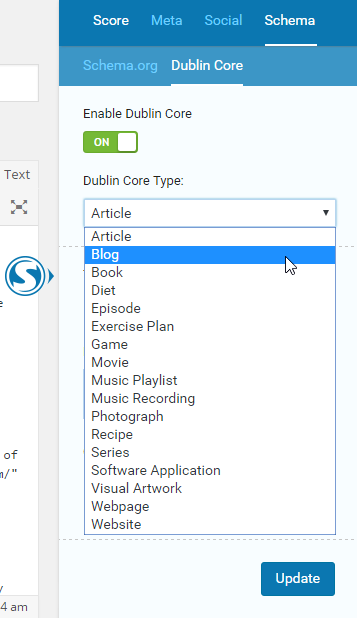
Step 2: Fill in your blog post details and the Creator.
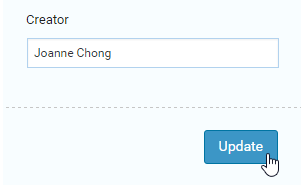
Step 3: Click ‘Update’ once you’re done.
Facebook Open Graph
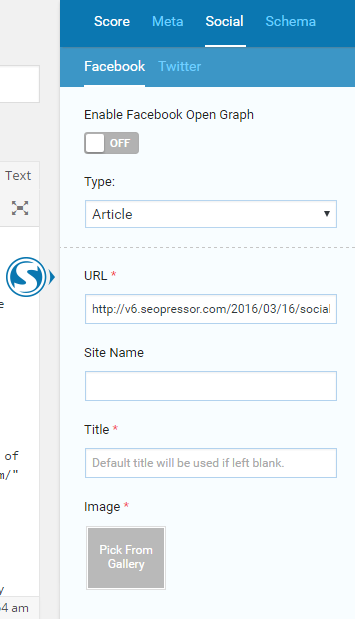
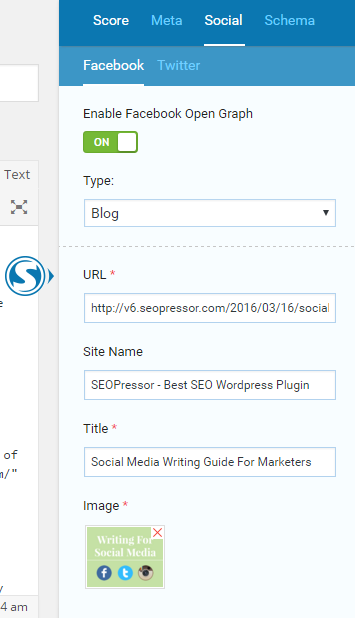
Step 1: Turn on the Facebook Open Graph to control how your blog post is shared on Facebook.
Step 2: After you turned it on, select the Type of your content.
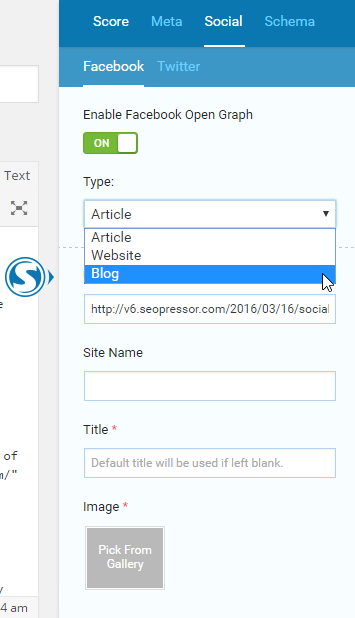
Step 3: Fill in your Site Name, Title, and choose the Image for your blog post.
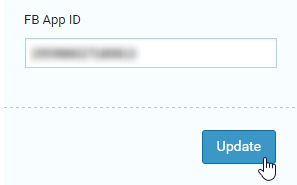
Step 4: Fill in your Description, Publisher, Author, Facebook Admin, and Facebook App ID.

Step 5: Click ‘Update’ once you’re done.
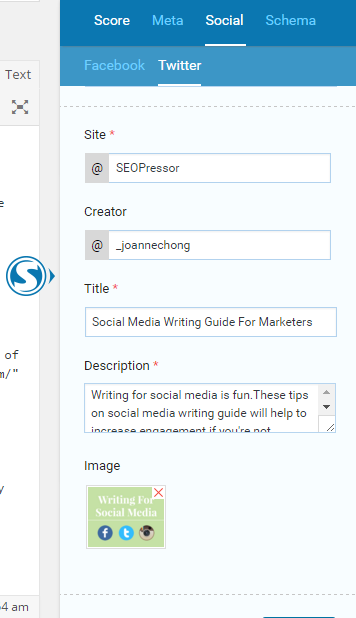
Twitter Card
Step 1: Turn on the Twitter Knowledge Graph to control how your blog post is shared on Twitter.
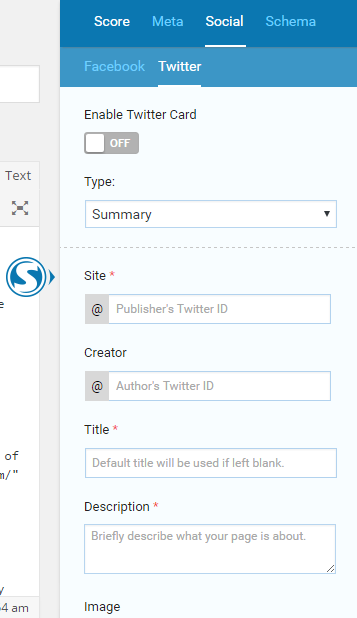
Step 2: Select the Type of your content. Whether you want to show only the summary on Twitter or summary with large image.
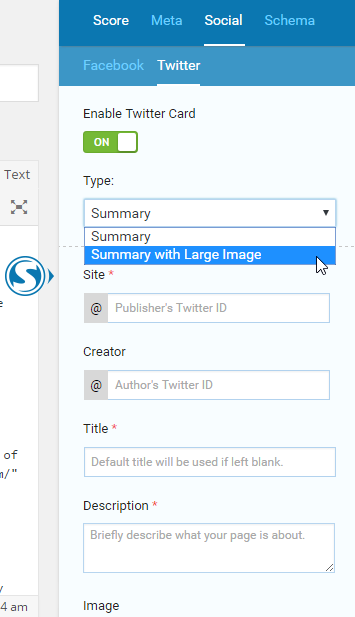
Step 3: Fill in the Site, Creator, Title, Description, and choose your Image for blog post.
Step 4: Click ‘Update’ once you’re done.
Pretty easy compared to manually coding them in don’t you think? And as an added benefit we also include only the data types often used in websites so users don’t have to sift through countless irrelevant categories.
Markup Builder is just one of many SEO tools that you can enjoy with SEOPressor Connect so be sure to check the rest of them.
To sum up what we’ve talked in this article, markup languages are playing an increasingly important role in both SEO and social media marketing.
Not implementing them can actually cost us. But as long as we realize that and learn the importance of markups there’s plenty of resources and tool to assist us along the way.
Do let me know if you’ve successfully implemented them and notice any improvements on your website in the comments section!
Updated: 25 January 2026


Save thousands of dollars (it’s 100x cheaper)

Zero risk of Google penalty (it’s Google-approved)

Boost your rankings (proven by case studies)
Rank High With This Link Strategy
Precise, Simplified, Fast Internal Linking.
