(Updated: 30 March 2016 – This is a legacy version of our tutorials. For the latest tutorials of SEOPressor Connect, please visit seopressor.com/tutorials/)
Tutorial Objectives
One of SEOPressor V5’s newest feature is that it automatically inserts a designated URL to your keyword in each post. From the first time you anchor a URL onto a keyword, it will automatically be stored into SEOPressor > Internal Links
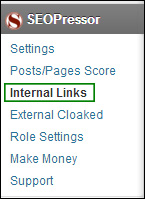
Once you’ve entered the page, you’ll see a list of internal links that have been automatically stored into your system.
As seen below, I’ve linked “About Google+” to an article post, “What You Need to Know About Google+”.

As such, future posts with the keyword “About Google+” would be automatically linked to the same internal link.
Alternatively, this is the page that allows you to customize your internal links before you even write the post.

So for example, if you wanted to link “SEO” to one of your pages, all you have to do is “Click to Add Internal Link” and fill in the necessary details.
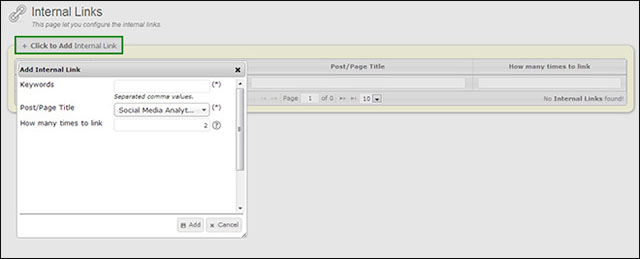
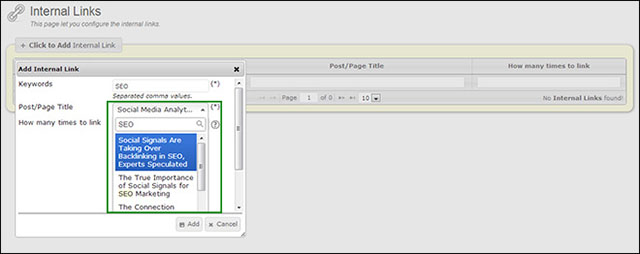
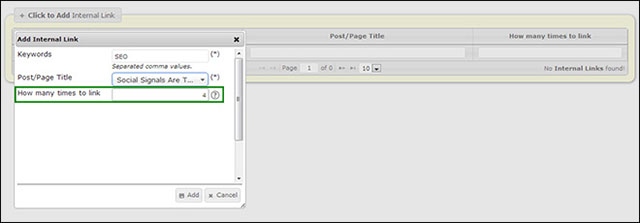
This should be the end result if you’ve done the above correctly:

And if you don’t want to link to internal pages but your external pages, you can do this by using the ‘External Cloaked’ option under ‘Internal Links’.

Just to recap, any URL that does not have the same domain name as your current WordPress site is known as an external link, so let’s say we want to have Wikipedia.org to always be linked whenever we type Wikipedia — this is how we do it:
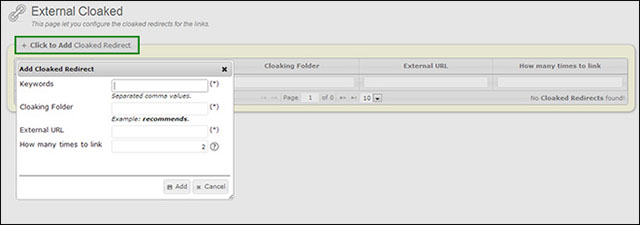
Similar to customizing your internal links, you’d also have to fill in the appropriate fields. But for external cloaked links, we have a special addition known as the ‘Cloaking Folder’.
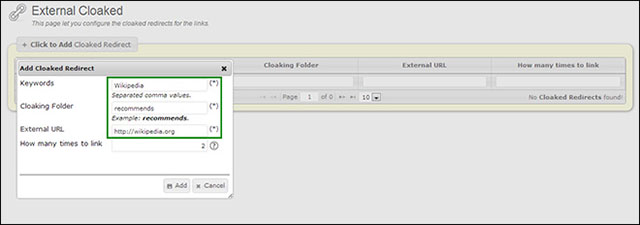
The reason why we call it “Cloaked” is because your external link will be disguised as an internal link, so even if the link’s original URL is http://wikipedia.org, using our function would turn it into:
https://seopressor.com/recommends/wikipedia
So any SEO marketer should be able tell you the significant benefits of having an external link looking like the above – keyword targeting and maximum SEO!
But of course, the disguise only appears when your mouse hovers over the hyperlink.
Once you’ve successfully filled in all the details and added, it should look something like this:

And that’s it, we’re done with using SEOPressor for on-page optimization!
I hope that this article has been a fulfilling and educational one for you.
Now that you’re done with the basic of SEOPressor, why not head over to our advanced WordPress SEO Course: 30 Days to Double Your Daily Traffic. You will learn all the insider’s tips and strategies there, make sure you don’t miss that out.